
DATA DISTRICT DOCUMENTATION
Installing MAKCU
Connect MAKCU to both computers, install the CH343 driver, configure the COM port, and flash it with AIO Tool.
7 min read Updated August 12, 2026 Verified by DATA DISTRICT DMA
Connect MAKCU correctly, install the CH343 driver on the secondary PC, assign a COM port below 10, and then flash both sides with MAKCU AIO Tool.
Connect MAKCU
- 1Connect the left cable to the main PC.
- 2Connect the middle cable to the secondary PC.
- 3Connect the right cable to the mouse.

Install the driver
- 1Open
DATA DISTRICT DMA\MAKCU\CH343 Driverfrom the extracted archive. - 2Right-click
CH343SER.INFand select Install. - 3Reconnect MAKCU and confirm that the COM device appears in Device Manager.
Configure the COM port on the secondary PC
- 1Open Device Manager and expand Ports (COM & LPT).
- 2Right-click the MAKCU COM device, select Properties, open Port Settings, and choose Advanced.
- 3Assign an available port from COM1 to COM9 and click OK.
- 4Close AIO Tool if it is open, then unplug and reconnect the left-most cable so the new port is applied.

Flash with MAKCU AIO Tool
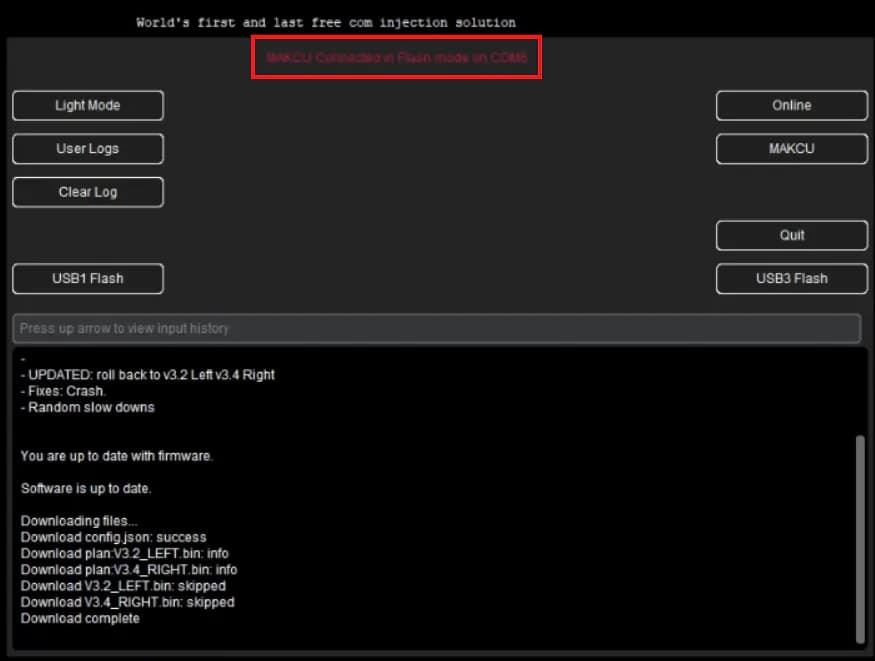
- 1Run AIO Tool on the secondary PC and allow it to update. Use one USB cable during each flashing stage.
- 2If the device has a 3D-printed enclosure, remove the top cover. Skip this step for an open board.
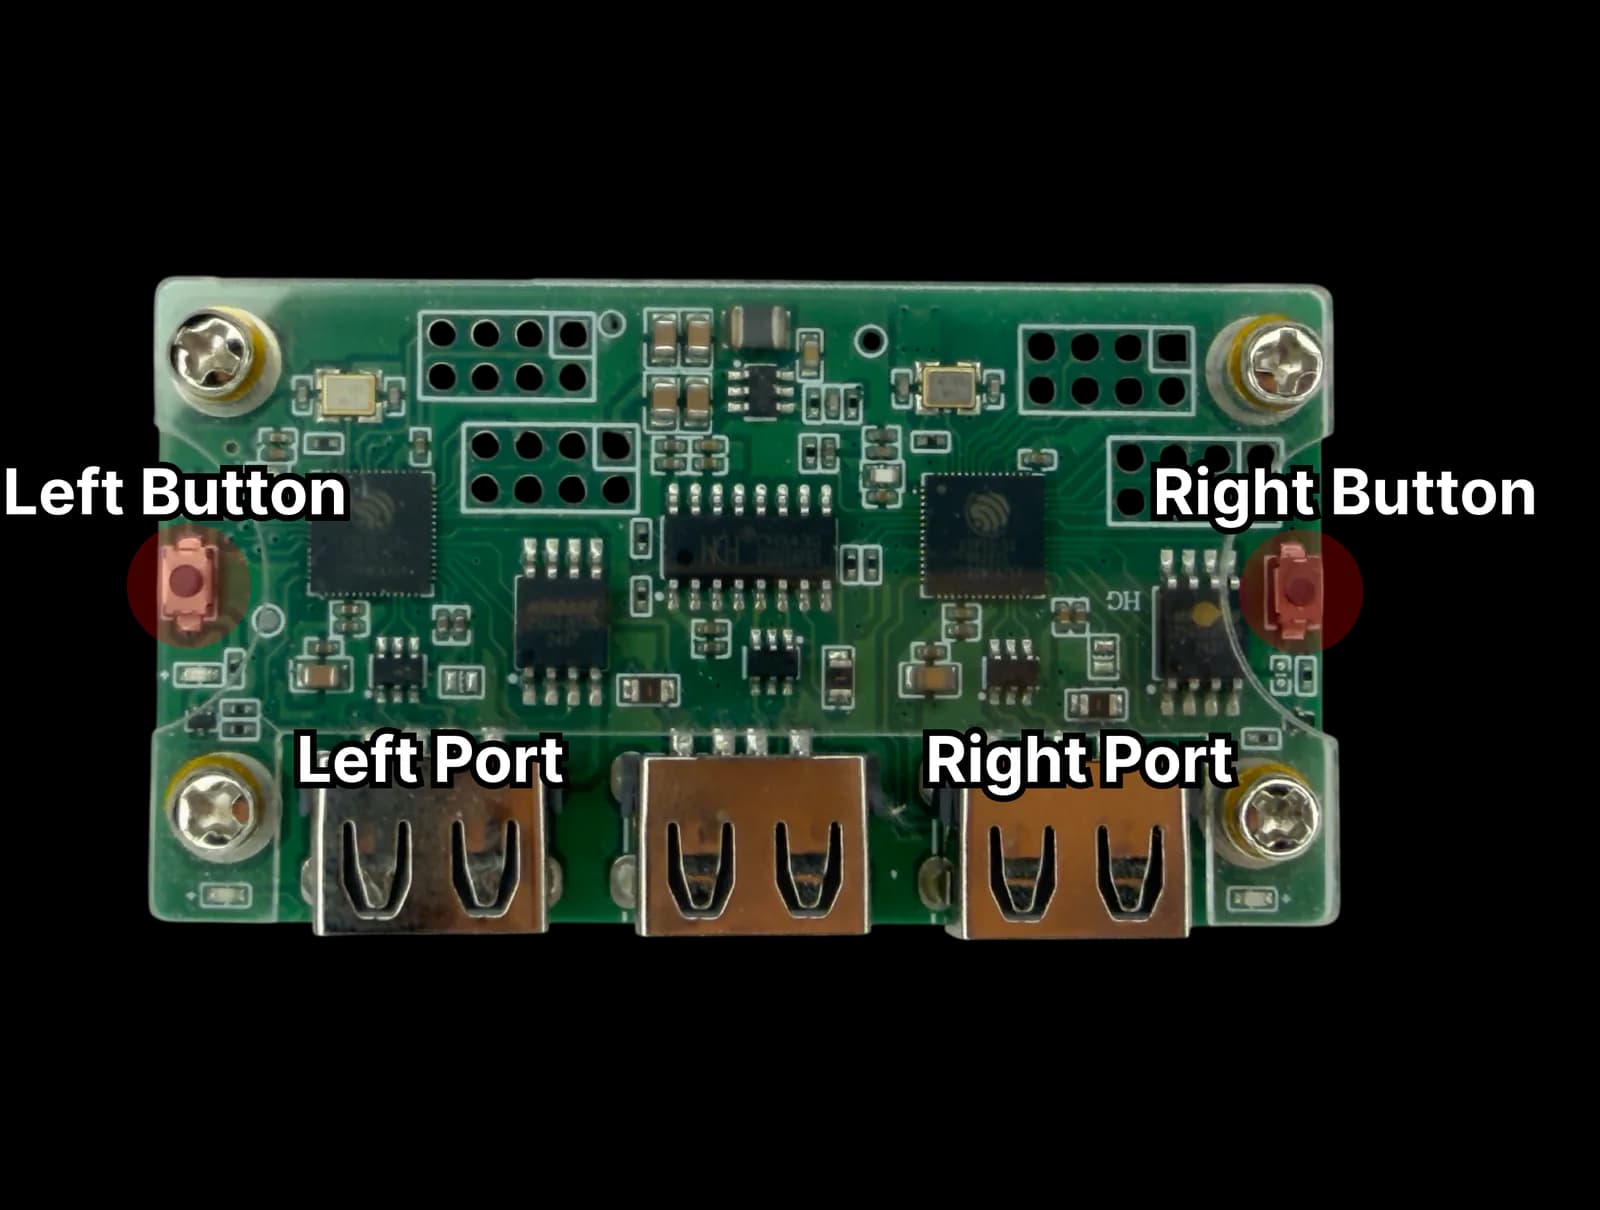
- 3Hold the left button, connect the cable to the left USB port, wait for “MAKCU Connected in Flash mode,” and select USB1 Flash.
- 4After completion, disconnect the left port. Hold the right button, connect the right USB port, and select USB3 Flash.
- 5Wait for the successful completion message before disconnecting. Refit the cover if the device has a 3D-printed enclosure.
NEED HELP?
Could not complete the guide?
Tell us your DMA card model, motherboard, Windows version, and attach a screenshot of the error.