
DATA DISTRICT DOCUMENTATION

How to Flash a DMA Card
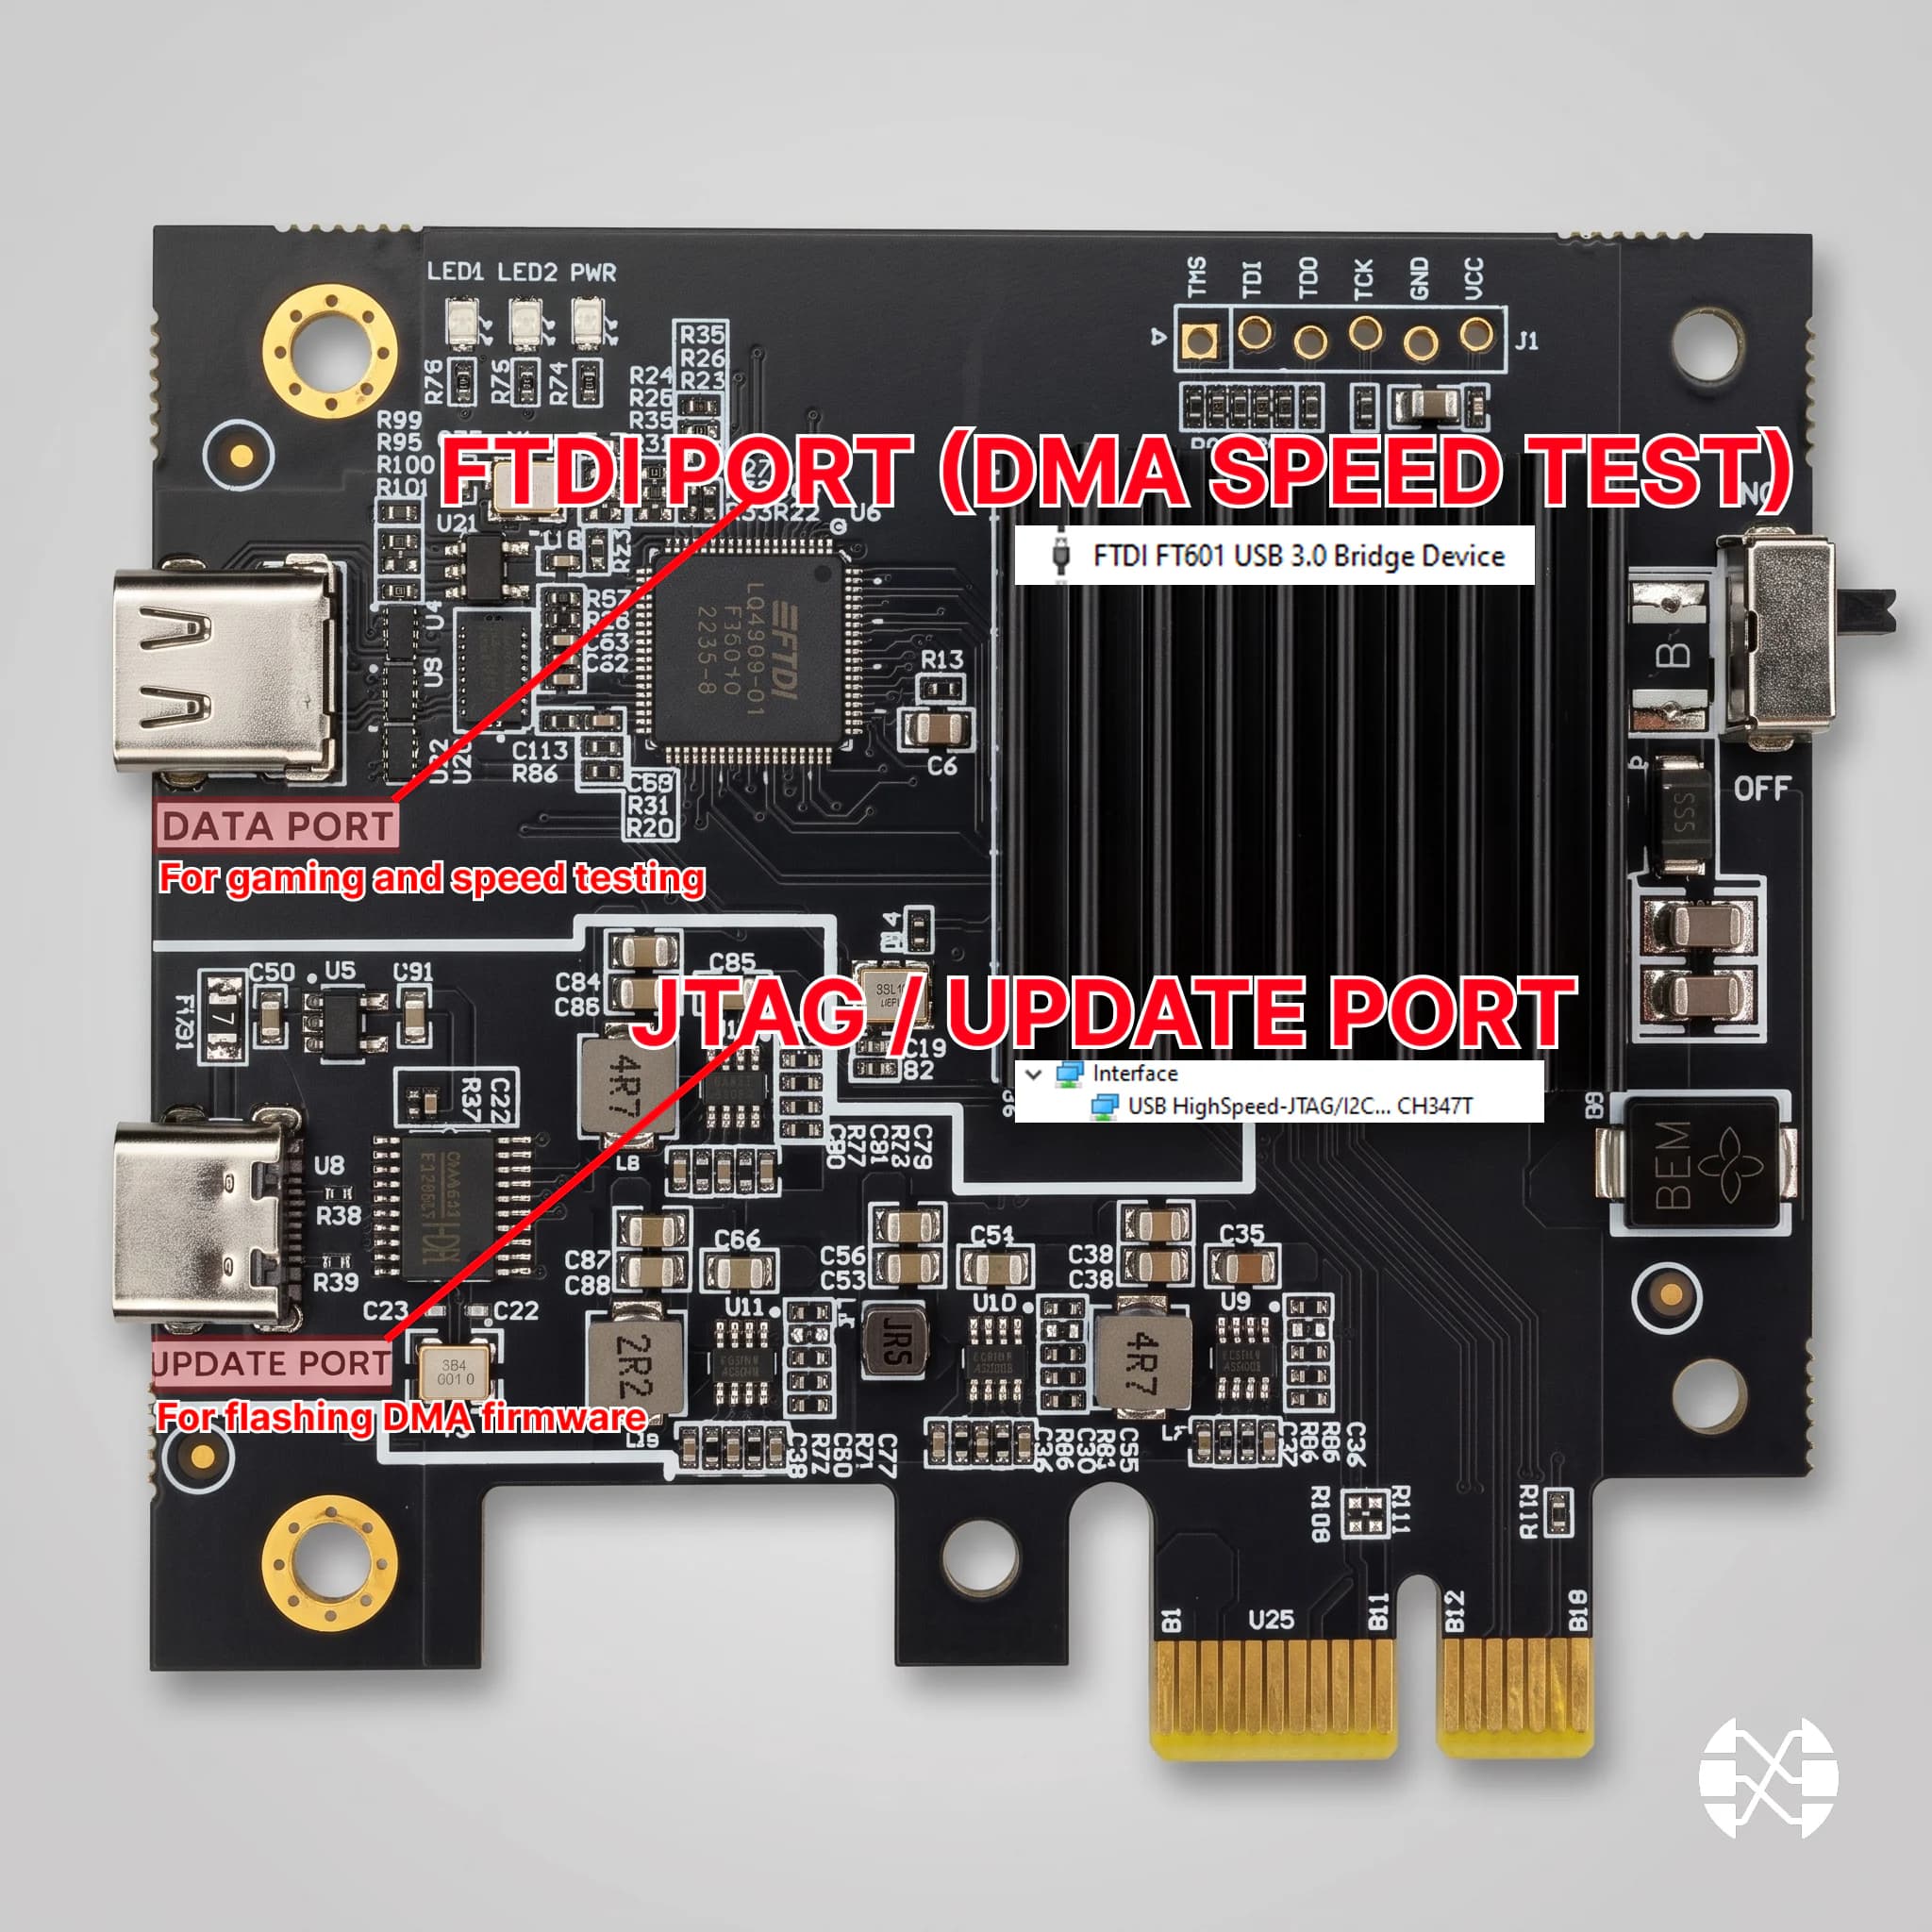
Prepare the service connection, select the correct driver and script, write the BIN file, and verify the result.
9 min read Updated August 12, 2026 Verified by DATA DISTRICT DMA
Use the card’s service JTAG port and only the driver, tool, model setting, and BIN file intended for its exact FPGA family. A file selected by guesswork can leave the card unusable.
Install the driver
- 1Download and fully extract the DATA DISTRICT DMA archive. Do not run tools from inside the compressed file.
- 2Connect the cable to the card’s JTAG / Update port and directly to the secondary PC.
- 3Install
JtagDrivers.exeor the driver included for the card interface, then restart the tool as administrator.
Prepare the firmware file
- 1Keep the firmware BIN file in a simple local folder and confirm that it belongs to the exact card and FPGA family.
- 2Do not rename or substitute files unless the supplied instructions explicitly require it.
- 3Close other applications that may access the USB device and prevent Windows from sleeping during the write.
Choose the correct script
- 1Choose the CH347 or RS232 script listed for the exact board model. Do not select a script solely because the FPGA number looks similar.
- 2Confirm the tool detects the connected interface before selecting the BIN file.
- 3If the model is not listed, stop and ask support before writing.
Write and finish
- 1Select the correct firmware BIN file and start the download/write operation.
- 2Do not disconnect USB, power off either PC, close the tool, or allow sleep while the progress indicator is active.
- 3Wait for a successful completion message, close the tool, shut both computers down completely, and disconnect the service cable.
- 4Reconnect the normal DATA port, cold-boot the systems, reinstall the FTDI driver if required, and run the full DMA Test.
NEED HELP?
Could not complete the guide?
Tell us your DMA card model, motherboard, Windows version, and attach a screenshot of the error.